 I love using all kinds of different containers to store my craft items in. I love old jars and baskets and things like that. They are so fun. What do you store your things in?
Wednesday, February 29, 2012
Fun Crafty Storage
I love using all kinds of different containers to store my craft items in. I love old jars and baskets and things like that. They are so fun. What do you store your things in?
Clothesline Basket

You have to buy the book "Wrap it up" by Susan Breier. It is an awesome book. There are purse patterns in there that are awesome. Give it a whirl. All you need is the book, a sewing machine that can do a zig zag stitch, thread, clothesline and fabric.
Saturday, February 25, 2012
New Card Design....sooo pretty!

I love making cards for people. It is so fun to put colors and different stamps and elements together to create a one of a kind creation or something that you can create a lot of to send out to many people. What makes it even more exciting for me is when I can create a card or set of cards for very little money.
Also, for me it is all about saving money. I go into sticker shock every time I see the price on the back of a "nice" store bought card...it's like a horror movie... :-)
And look what pretty little things you can make for hardly nothing at all.
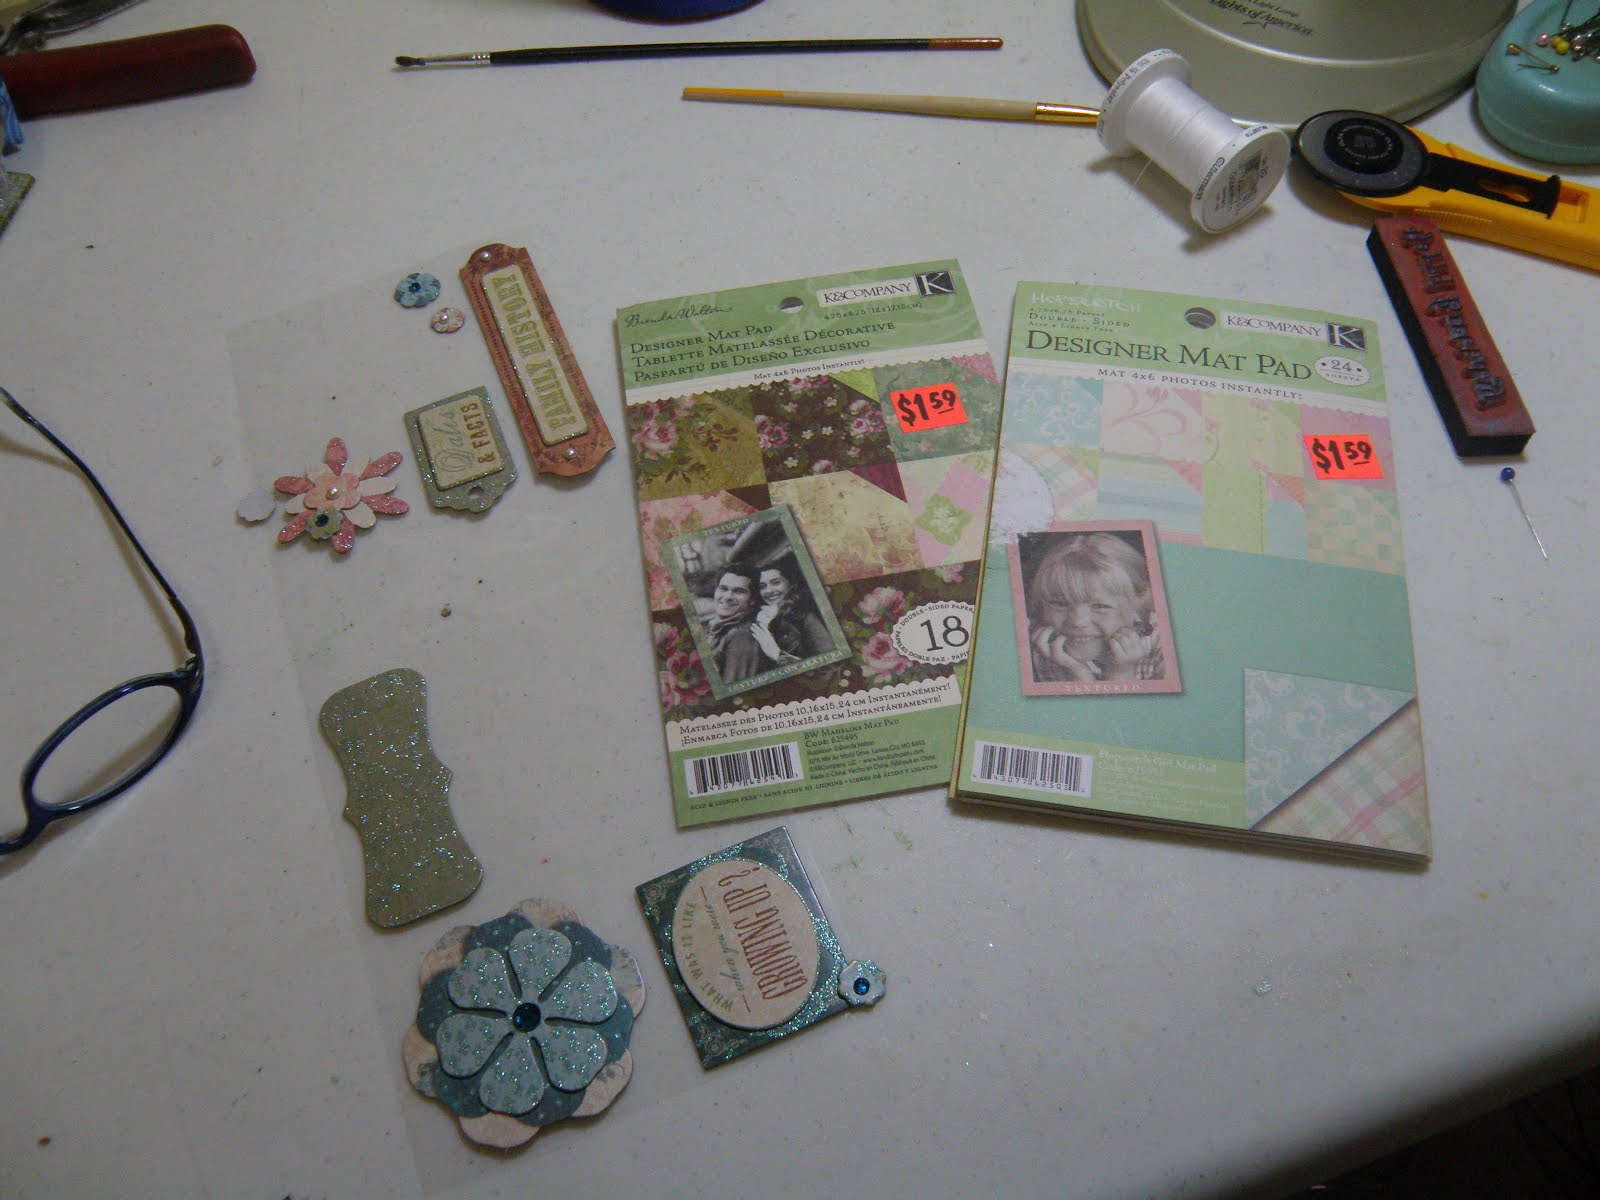
This card was created from a pack of paper that I got at the "super dollar" store for $1.59. I also purchased the little flower accent (which was actually a whole sheet of different sizes and colors) for just $1. I usually buy a pack of card stock from walmart for about $4 or less, a glue stick, paper cutter (nice but not necessary) and a Happy Birthday stamp from the $1 bin at Michaels. How can you go wrong with that.

You could actually make many different cards with just those few items. I know so far I have made at least 10-12 cards from that size pack of paper and there is still plenty left. Maybe I'll post some of those later to show you. :-)
I did a video tutorial for you on youtube http://www.youtube.com/watch?v=TbDAtQyk8Wo&context=C3e1c8d7ADOEgsToPDskLcGeJIsNQ-1cKnCNOQpmli
Tuesday, February 21, 2012
What's in YOUR Pocket?

So....I was downstairs digging around in my fabric bins and came across a project that I've been meaning to take advantage of and never did. (like that's never happened before) I found 6 back pockets from old jeans that I was meaning to use for napkin and silverware holders. You know, like a different twist on a napkin ring.
I think it would be really fun if you had red and white checked placemats. I think they still look cute even without the red and white checks. I think they are fun the way they are and the kids sure get a kick out of them.....but how cool would they be to have sparkly things on them or ribbon or flowers. I can't do that with the boys using them, that wouldn't be "cool"
:-/ .....although it gives me an idea that maybe I could make a set just for us girls when we have tea parties.......we could "girlie" them up a bit......hmmmm???

Monday, February 20, 2012
One...two...tie my shoe?
 I was thinking of this cute little pair of pink tennis shoes that my oldest daughter had when she was approximately two years old.
She looked so cute in them. When she outgrew them I decided to try my luck at making a little activity book with them. Actually I only used one shoe and I use the other one to decorate for Valentine's Day or for summer.

This was my first attempt at making a book....back in the day. Mind you that I didn't have a very good sewing machine and had never done one before and didn't even have a pattern. It was all in my head. This book is looking a little rough, but it is almost 16 years old. It gives you an idea of what it could look like. I remember that she loved this little book. I traced her hand for the 1..2..3 page. The grass on the cover, under the tree has velcro on it so she could take it on and off. She had to button the clowns coat and his clothes were made from an outfit of hers.

I made two large rectangles for each section....the full width of the two pages. I put any embellishments on that I was going to do, before I sewed them together. If you have a fancy machine, you could actually embroider the words on there or you could print it out on the computer on fabric/paper sheets and fusible web them on. I didn't know about any of that stuff back then and just wrote it on with a machine washable marker.
I sewed them together kind of pillow case style and left a small opening to turn them right side out. All together there were four rectangles that made two sheets that I laid on top of each other and sewed down the middle. So there are four pages.....do I have you thoroughly confused yet? So the image below is one set of the rectangles and sewn down the middle to look like separate pages.

make sure if you decide to make one that you put on it somewhere your name and the date you made it. I had every intention of making one for each of my kids, but as everyone knows when you start having more kids, your time seems to disappear a lot quicker. :-)
Have fun crafting and keep checking back to see what else I pull out of my "archives".
Friday, February 17, 2012
Valentines Vase

I'm not sure where I got this idea from, but I usually see them somewhere or see an item and then think...."how can I make that, cheap?"
So I started at the thrift store and found a clear glass vase that I liked the shape of. I brought it home, washed it up and made sure it was dry inside and got out my craft paints.
I chose red, pink and white....I was also thinking how fun a glitter paint might be. Anyway, you might have to thin the paint a little because you want it to be able to run or travel well along the glass, but not so much that it's drippy. eww! You then put some drops together inside or next to each other to be more exact. Do this on a few of the sides and then start swirling it around until the the entire inside is covered with paint. Tip it in all directions if you like. It really makes a cool effect.

Now you can't really put water in this unless you spray some kind of sealer in it. It is water based craft paint and will wash away....not a good plan. I never sealed the inside of mine because I either just leave it like it is or put a fake Valentine's bouquet it in. :-)
I was thinking I may be posting another pic to go with this. I love the color turquoise or teal blue so I may try to do one that color or one to go with my living room colors....fun!!!
Don't forget there is a Michael's coupon at www.michaels.com. Just go to the weekly ad page.
There is a 50% off coupon going on right now.
Subscribe to:
Posts (Atom)